The Ledger initialization process creates the cryptographic keys that protect private keys within the certified secure element, ensuring cold storage security from the first moment of use. Following correct setup procedures prevents configuration errors that could compromise crypto security or create recovery difficulties.
The Ledger Nano X setup and other model configurations follow similar patterns with model-specific variations in connectivity and interface. Understanding each initialization step helps users complete setup confidently while avoiding common mistakes that delay or complicate the process. This guide covers unboxing Ledger device procedures through firmware verification for complete hardware wallet configuration across all supported coins.
Proper setup requires dedicated time in a private environment without distractions. The initialization process typically takes 15-30 minutes depending on firmware update requirements and user familiarity with the procedures via USB-C or Bluetooth connection.
Unboxing the Ledger Device
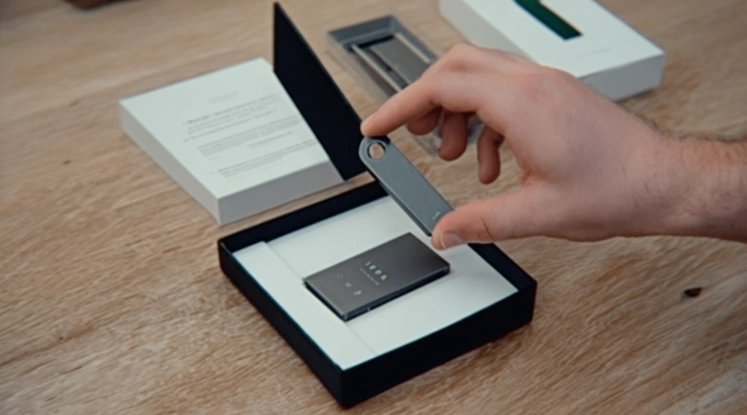
Unboxing Ledger Device properly ensures the hardware wallet arrives in genuine, untampered condition ready for secure initialization. The verify packaging step confirms security seals remain intact from manufacturing while check device serial procedures validate authenticity against Ledger records. Careful unboxing protects against compromised devices that could threaten cryptocurrency holdings.
The unboxing process should occur in a private location where recovery phrase display cannot be observed. Document any packaging irregularities with photographs before proceeding with device removal for potential support reference.
Verify Packaging
Verify packaging integrity through systematic inspection:
| Seal Type | Location | Genuine Condition |
|---|---|---|
| Holographic sticker | Box opening flap | Color-shifting, intact |
| Security tape | Box edges | No "VOID" marks visible |
| Plastic wrap | Outer box | Factory-applied appearance |
| Device seal | Around device | Unbroken clear wrap |
| Card envelope | Recovery cards | Sealed, unopened |
| Cable packaging | USB-C cable | Factory sealed |
Verify packaging inspection identifies repackaged or tampered devices before the Ledger initialization process begins. Any seal irregularities warrant support contact before proceeding with cold storage setup.
Check Device Serial
Check device serial validation process:
- Locate serial number on device back label
- Compare with serial printed on packaging
- Document serial for future reference
- Serial verified during Ledger Live genuine check
- Matching serials indicate authentic device
- Mismatched serials require investigation
- Support can verify serial against manufacturing records
Check device serial ensures the hardware wallet inside matches the packaging records. This verification complements electronic authentication during Ledger hardware wallet setup for secure element confirmation unlike Trezor or KeepKey verification.
Connecting Ledger to Computer
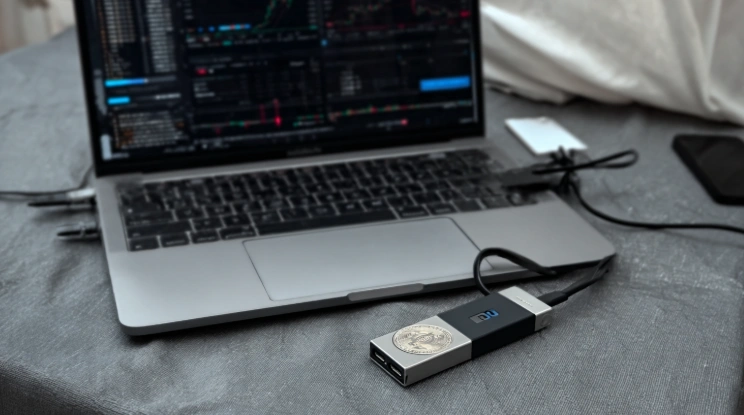
Connecting Ledger to Computer establishes the communication channel between hardware wallet and management software. The USB connection provides reliable data transfer for Ledger Nano X setup and all current models. The desktop recognition process confirms proper driver installation and device communication for crypto security.
Connection should occur after Ledger Live installation to ensure proper driver availability. Some operating systems require additional configuration for USB device recognition.
USB Connection
USB connection process for hardware wallet setup:
- Install Ledger Live on computer before connecting device
- Locate included USB-C cable from packaging
- Connect USB-C end to Ledger device
- Connect USB-A end to computer (or use USB-C port)
- Device powers on automatically when connected
- Screen displays Ledger logo during boot
- Follow on-screen prompts for initial setup
- Complete PIN configuration when prompted
- Proceed with recovery phrase setup
- Connection remains for ongoing configuration
USB connection provides power and data communication for all Ledger hardware wallet setup procedures. The secure element communicates through this connection without exposing private keys to the host computer via USB-C.
Desktop Recognition
Desktop recognition requirements by operating system:
| Operating System | Driver Status | Additional Steps |
|---|---|---|
| Windows 10/11 | Auto-install | None typically required |
| macOS 11+ | Built-in support | Security approval may prompt |
| Ubuntu 20.04+ | udev rules needed | Install from Ledger docs |
| Fedora 35+ | udev rules needed | Install from Ledger docs |
| Chrome OS | Limited support | Use Android app alternative |
Desktop recognition confirms proper communication between computer and hardware wallet. Failed recognition requires troubleshooting before Ledger initialization can proceed for cold wallet configuration.
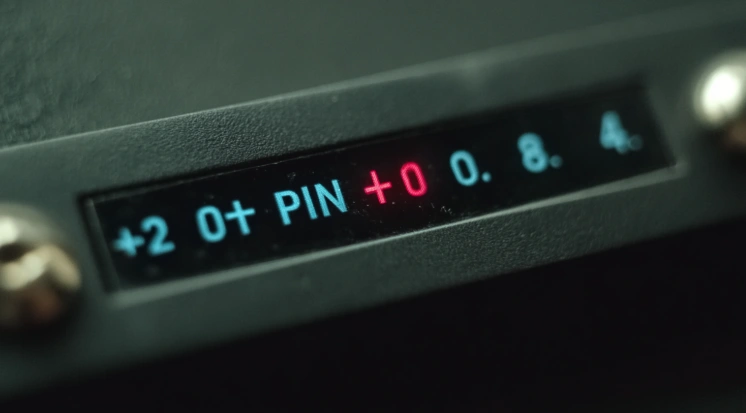
PIN Code Configuration
PIN Code Configuration creates the access control barrier preventing unauthorized device use during Ledger hardware wallet setup. The secure PIN selection process establishes a 4-8 digit code that protects against physical device theft. Understanding PIN recovery options helps users manage access credentials appropriately for private keys protection.
PIN configuration occurs on the device itself, ensuring the code never exists on connected computers where malware could capture it. The secure element enforces PIN requirements without external bypass capability.
Secure PIN Selection
Secure PIN selection best practices:
- Choose between 4-8 digits in length
- Avoid sequential numbers (1234, 5678)
- Avoid repeated digits (0000, 1111)
- Avoid birth dates or anniversaries
- Avoid phone numbers or addresses
- Select unique PIN not used elsewhere
- Consider longer PIN for enhanced security
- Memorize without written storage
- Enter directly on device display only
Secure PIN selection creates strong access protection for Ledger Nano X setup and all models. Three incorrect PIN attempts trigger device wipe protecting crypto security if device is stolen for all supported coins.
PIN Recovery Options
| Scenario | Recovery Method | Requirements |
|---|---|---|
| Forgotten PIN | Device reset + phrase restore | Recovery phrase |
| Device wipe (3 fails) | New device setup + restore | Recovery phrase |
| PIN compromise | Transfer funds, reset | Access + new phrase |
| Inherited device | Reset + restore | Recovery phrase |
PIN recovery options depend entirely on recovery phrase availability. Without the phrase, forgotten PIN results in permanent fund loss, emphasizing phrase backup importance during Ledger hardware wallet setup via USB-C or Bluetooth.
Recovery Phrase Setup
Recovery Phrase Setup generates the 24-word backup that enables cryptocurrency recovery across any compatible hardware wallet. The offline phrase generation process creates words within the secure element without external exposure. Following secure backup methods protects the phrase for potential future recovery needs.
Recovery phrase setup represents the most critical security procedure during Ledger initialization. Mistakes during this phase compromise long-term cold storage security regardless of other protective measures.
Offline Phrase Generation
Offline phrase generation security requirements:
- Device generates phrase using internal hardware RNG
- Words display only on hardware wallet screen
- Computer or phone never sees phrase
- Write words on provided recovery cards
- Record exact spelling and sequence
- Device prompts verification of selected words
- Enter words when requested to confirm accuracy
- Verification success confirms correct recording
- Phrase stored encrypted in secure element
- No digital copy exists anywhere
Offline phrase generation ensures private keys backup never exists on internet-connected devices. This isolation prevents malware capture during Ledger hardware wallet setup for crypto security.
Secure Backup Methods
| Method | Durability | Security Level | Cost |
|---|---|---|---|
| Paper cards (included) | Low (fire/water risk) | Medium | Free |
| Metal backup plate | Very High | High | $89-129 |
| Cryptosteel Capsule | Very High | High | $99 |
| Multiple paper copies | Low per copy | Medium | Free |
| Bank safe deposit | High | Very High | $50+/year |
Secure backup methods should balance durability against accessibility. Metal backups resist fire, water, and physical damage protecting cold wallet recovery capability unlike Trezor or KeepKey backup approaches.
Initial Firmware Check
Initial Firmware Check confirms device software integrity and currency before storing any cryptocurrency. The Ledger Live verification process cryptographically authenticates the secure element. The firmware version confirmation ensures latest security patches are installed for complete Ledger hardware wallet setup.
Firmware verification should complete before depositing any funds. Outdated firmware may contain known vulnerabilities that updates have addressed for private keys protection.
Ledger Live Verification
- Download Ledger Live only from ledger.com
- Verify installer checksum against published values
- Install and launch application
- Connect device via USB-C cable
- Follow genuine check prompts
- Cryptographic attestation verifies secure element
- Green checkmark confirms authentic device
- Failed check indicates counterfeit device
Ledger Live verification provides cryptographic proof of device authenticity. The verification process confirms both hardware and firmware integrity for Ledger initialization completion across all supported coins.
Firmware Version Confirmation
- Ledger Live displays current firmware version
- Application compares against latest release
- Update notification appears if newer version available
- Follow prompts to initiate update process
- Device displays update confirmation
- Approve update on hardware wallet
- Update downloads and installs
- Device restarts with new firmware
- Genuine check confirms successful update
- Setup continues with current firmware
Firmware version confirmation ensures Ledger Nano X setup and other models begin with latest security protections. Regular updates maintain crypto security throughout device lifetime via USB-C connection.
For Nano S Plus specific setup, see our Setting Up Ledger Nano S Plus Safely guide. For quick start, visit Ledger Hardware Wallet Quick Start.